Troubleshooting Common Boiler Problems: A Step-by-Step Guide
Imagine this: it’s a chilly winter morning, and you wake up to find your home feeling more like…
Why you can trust our content
We understand that the boiler industry can be confusing, with plenty of outdated or misleading information. That’s why we rely only on trusted, proven sources to guide our advice and installations:

At a glance
Imagine this: it’s a chilly winter morning, and you wake up to find your home feeling more like an icebox than a cosy haven. The cold water in your appliance and frozen condensate pipe can make it difficult to heat water. The cold water in your appliance and frozen condensate pipe can make it difficult to heat water. You rush to the basement, only to discover that your boiler is making strange noises and refusing to heat water, providing the warmth you desperately need. It seems like there might be a problem with the frozen condensate pipe. In this situation, it’s important to make an emergency call for help before you’re left with cold water. Frustration sets in as you realise that you’ll have to endure freezing temperatures until the emergency call for a frozen condensate pipe job arrives.
In this comprehensive guide, we will explore several reasons behind common boiler problems at work, provide step-by-step instructions for troubleshooting them effectively, and emphasise the importance of consulting your system’s manual along the way. Additionally, we will include some insightful quotes from industry experts to further enhance your understanding.
Identifying and Fixing Cold Radiators
Is there anything more frustrating than a cold radiator on a chilly day? When your home heating system isn’t working properly, it can quickly turn your cosy haven into an uncomfortable space.
Causes of Cold Radiators
There are several reasons why your radiators may be failing to heat up adequately. One common culprit is trapped air in the system. Over time, air can accumulate within the pipes and prevent hot water from circulating effectively. Another possible cause is a buildup of sludge or debris within the radiator itself, obstructing the flow of heated water. If your boiler pressure is too low, it may not be able to distribute hot water efficiently throughout the system.
Bleeding Air from Radiators
Bleeding air from radiators is a simple yet effective method to improve heat distribution in your home heating system. Here’s how you can do it:
- Start by turning off your central heating system.
- Locate the bleed valve on each radiator in your home.
- Place a towel or container beneath the valve to catch any water that may escape.
- Using a radiator key or screwdriver (depending on the type of bleed valve), slowly turn the valve counterclockwise until you hear a hissing sound.
- Keep turning until water starts dripping out steadily.
- Once water begins to flow consistently without any air bubbles, close the valve tightly.
By bleeding air from your radiators regularly, you can ensure that they work efficiently and provide optimal warmth throughout your home.
Other Potential Reasons for Cold Radiators
If bleeding air doesn’t solve the problem entirely, there might be other underlying issues causing cold radiators in your home heating system. Consider these potential reasons and their corresponding fixes:
- Low boiler pressure: Check the pressure gauge on your boiler and ensure it is within the recommended range. If it’s too low, you may need to repressurize the system.
- Blocked pipes: Inspect the pipes connected to your radiators for any obstructions or blockages. Clearing them out can restore proper water flow.
- Faulty thermostatic radiator valves (TRVs): If certain radiators remain cold while others heat up, faulty TRVs could be to blame. Consider replacing them with new ones.
Remember, if you’re unsure about performing any of these troubleshooting steps yourself, it’s always best to consult a professional heating engineer.
Dealing with Frozen Condensate Pipe Issues
Frozen condensate pipes can be a major headache, leading to boiler breakdowns and leaving you without heat and hot water. Understanding why these pipes freeze and learning effective methods to thaw them is crucial for troubleshooting common boiler problems. Discovering preventive measures can help you avoid future freezing of condensate pipes.
Condensate pipes freeze when the water inside them solidifies due to low temperatures. This blockage prevents the proper drainage of condensation from your boiler, resulting in a shutdown. To address this issue, here are some steps you can take:
Thawing a Frozen Condensate Pipe Safely
- Locate the frozen section: Start by identifying where the pipe is frozen. Look for any visible signs such as frost or ice buildup.
- Apply warm water: Gently pour warm (not boiling) water over the frozen area of the condensate pipe. This will gradually melt the ice and allow it to flow away.
- Use a hot water bottle or heating pad: Wrap a hot water bottle or heating pad around the frozen section of the pipe. The heat will aid in thawing it more quickly.
- Insulate exposed sections: Once you have successfully thawed the condensate pipe, consider insulating any exposed sections to prevent future freezing.
Preventive Measures for Avoiding Freezing
- Install insulation: Insulate both internal and external condensate pipes using foam insulation sleeves or wrap them with self-adhesive insulation tape.
- Relocate exterior pipes: If possible, relocate external condensate pipes to an area less prone to freezing, such as an indoor space or an insulated duct.
- Keep airflow clear: Ensure that there are no obstructions near exterior outlets or vents that could impede air circulation around the condensate pipe.
- Maintain adequate heating: Keep your home heated to a sufficient temperature, especially during colder months. This helps prevent condensate pipes from freezing.
By following these steps and implementing preventive measures, you can effectively deal with frozen condensate pipe issues. Remember, if you are unsure or uncomfortable performing any of these tasks yourself, it is always best to seek professional assistance.
Troubleshooting Pilot Light Problems
Identifying Common Pilot Light Issues
Pilot light problems are a common cause of boiler malfunctioning. Understanding the common issues that can arise with the pilot light is crucial for troubleshooting and resolving these problems effectively.
One common issue is a weak or flickering pilot light. This could be due to a dirty or clogged pilot tube, which restricts the flow of gas. Another possible cause is a faulty thermocouple, a safety device that detects whether the pilot light is lit. If the thermocouple is defective, it may not allow gas to reach the pilot light, causing it to go out.
Relighting a Pilot Light Correctly: Step-by-Step Instructions
Relighting a pilot light may seem daunting at first, but with step-by-step instructions, you can do it yourself safely and efficiently.
- Start by locating the gas valve control knob on your boiler. It should have three positions: “Off,” “On,” and “Pilot.”
- Turn the knob to “Off” and wait for at least five minutes to allow any residual gas to dissipate.
- After waiting, turn the knob to “Pilot.” While pressing down on the knob, use a long lighter or matchstick to ignite the pilot burner located near the bottom of your boiler.
- Keep holding down the control knob for about one minute after lighting the pilot light. This allows heat from the flame to warm up and activate the thermocouple properly.
- Release the control knob gently after one minute while ensuring that the flame remains lit.
- Finally, turn the gas valve control knob from “Pilot” to “On.” Your boiler should now start functioning correctly again.
Knowing When to Seek Professional Help
While relighting a pilot light can often solve minor issues, there are situations where it’s best to call in a professional for assistance:
- If you smell gas before or after attempting to relight the pilot light, evacuate your home immediately and contact a professional plumber or gas company.
- If the pilot light keeps going out despite repeated attempts to relight it, there may be an underlying problem that requires professional diagnosis and repair.
- When dealing with complex boiler systems or if you are unsure about any aspect of troubleshooting the pilot light, it’s always wise to consult a qualified technician who can provide expert guidance.
Remember, safety should be your top priority when dealing with gas appliances. If in doubt or if you encounter any potentially dangerous situations, don’t hesitate to seek professional help.
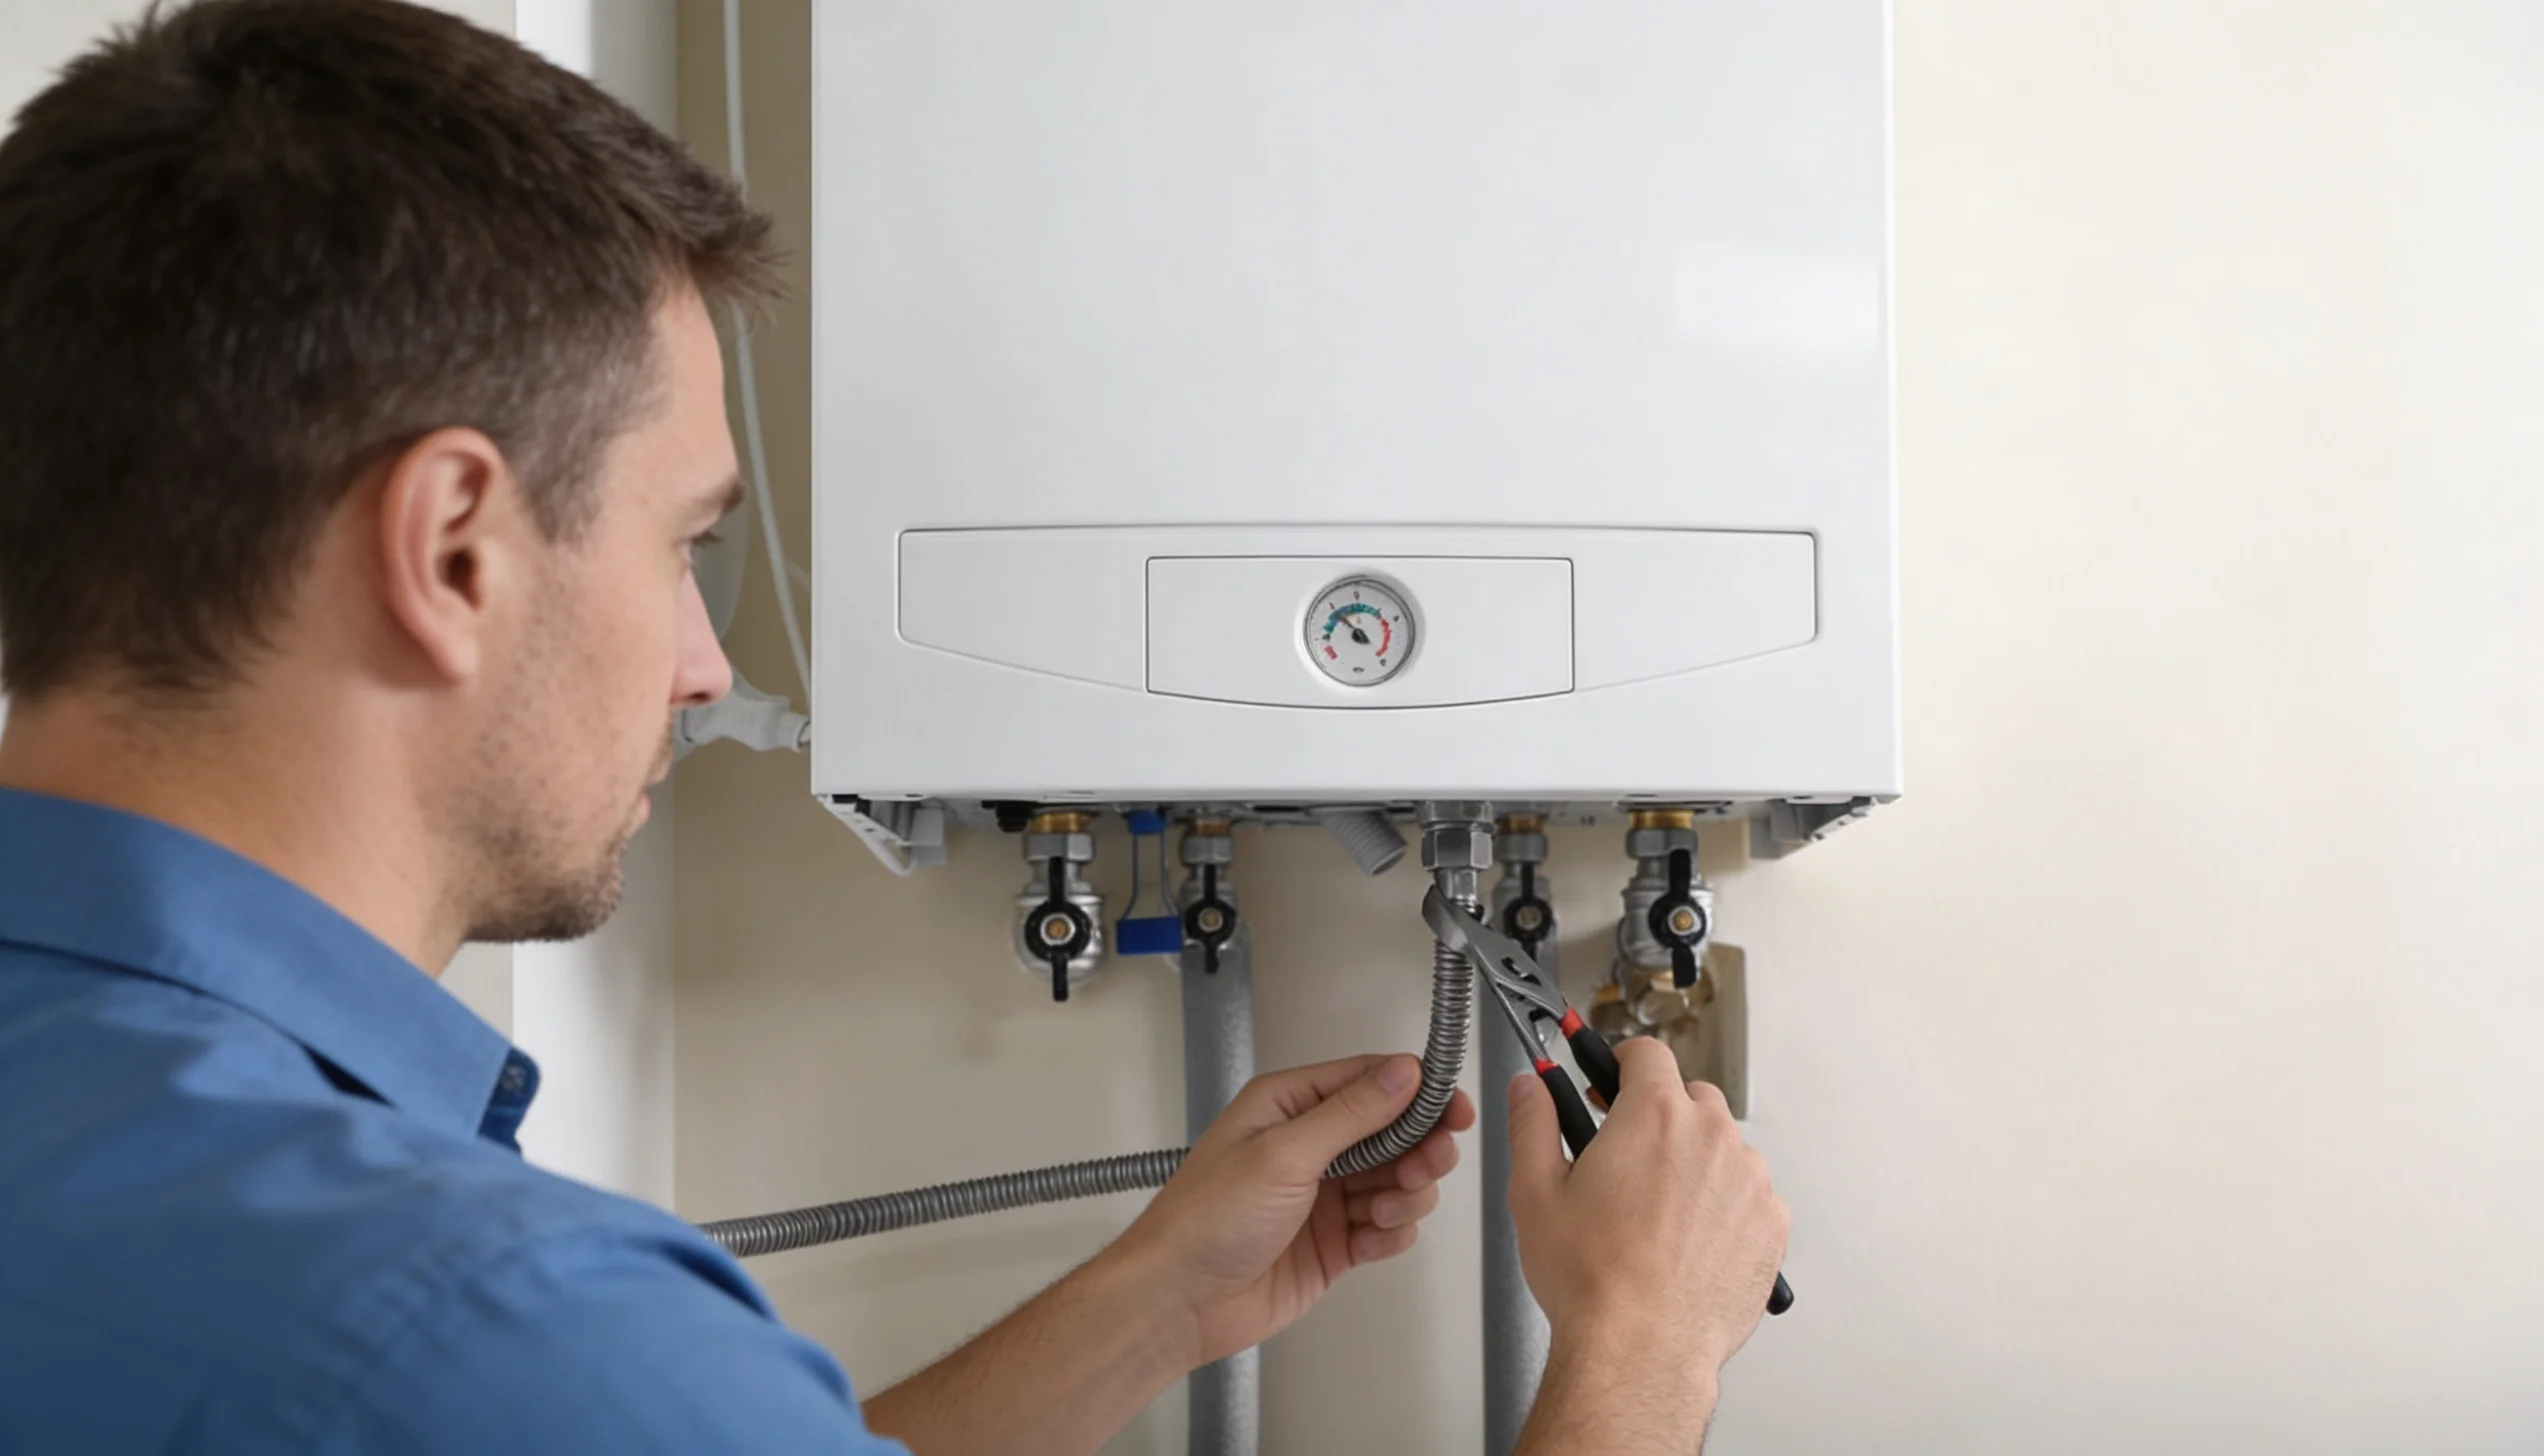
Fixing Boiler Water Leaks
Water leaks in your boiler system can be a frustrating and potentially costly problem. It is important to recognize the signs of water leaks, understand their causes, and know how to address them. Regular maintenance also plays a crucial role in preventing water leaks. In this guide, we will take you through step-by-step instructions on fixing boiler water leaks.
Recognize signs of water leaks in your boiler system
Detecting water leaks early on can save you from further damage and expenses. Here are some common signs that indicate a potential boiler leak:
- Dripping or pooling water: If you notice any water dripping from the boiler or pooling around it, it is a clear sign of a leak.
- Loss of pressure: A sudden drop in boiler pressure could be an indication of a leak somewhere within the system.
- Visible corrosion: Check for any rust or corrosion on the pipes connected to your boiler as it may indicate a leak.
Discover possible causes of water leaks and how to address them
Understanding the underlying causes of water leaks is essential for effective troubleshooting. Here are some potential reasons for boiler water leaks along with corresponding solutions:
- Damaged seals or gaskets: Over time, seals and gaskets can deteriorate, leading to leakage. To fix this issue, replace the faulty seals or gaskets.
- Cracked heat exchanger: A cracked heat exchanger can cause water leakage within the boiler system. In such cases, professional repair or replacement is necessary.
- Faulty filling loop: The filling loop allows you to add pressure to your boiler when needed. If the filling loop is damaged or not properly connected, it can result in leaks. Inspect the filling loop and replace it if necessary.
Learn about the importance of regular maintenance in preventing water leaks
Regular maintenance plays a vital role in preventing boiler water leaks. By following these maintenance practices, you can minimise the risk of leaks:
- Annual servicing: Schedule annual boiler servicing by a qualified technician to ensure that all components are in good working condition.
- Monitor pressure levels: Regularly check the pressure gauge on your boiler and maintain it within the recommended range.
- Inspect pipes for corrosion: Check the pipes connected to your boiler for any signs of corrosion or damage. Replace any corroded pipes promptly.
By staying vigilant and addressing potential issues promptly, you can prevent water leaks and prolong the lifespan of your boiler system.
Hiring a Gas gas-safe engineer for Gas-related Issues
It is crucial to hire a qualified and experienced gas-safe engineer. Attempting to fix these issues alone can be dangerous and may lead to further complications. Here’s why you should always rely on professionals for such jobs.
Understand the Importance of Hiring a Qualified Gas gas-safe engineer
Gas-related problems require specialised knowledge and expertise to ensure safety and efficiency. A gas-safe engineer possesses the necessary qualifications and certifications to handle these issues effectively. By hiring an accredited professional, you can have peace of mind knowing that they have undergone rigorous training and are equipped with the skills needed to address any gas-related problem.
Look for the Right Qualifications and Certifications
When searching for a gas-safe engineer, make sure they are registered with the appropriate authorities. Look for engineers who are Gas Safe registered, as this certification guarantees their competence in handling gas appliances safely. Check if they have relevant industry certifications or memberships that showcase their commitment to maintaining high standards.
Benefits of Hiring Professionals Instead of Attempting DIY Repairs
While it may be tempting to save money by attempting DIY repairs on your boiler or other gas appliances, it is not worth compromising your safety.
Here are some benefits of hiring professionals:
- Expertise: Gas-safe engineers possess extensive knowledge about different types of boilers and heating systems. They can quickly diagnose problems and provide effective solutions.
- Safety: Dealing with gas can be hazardous if not handled properly. Professionals understand the risks involved and follow strict safety protocols during repairs.
- Time-saving: With their experience, professionals can efficiently troubleshoot common boiler problems, saving you time and effort.
- Long-term cost savings: Incorrect repairs or installations can lead to more significant issues down the line, resulting in costly repairs or even replacements. Hiring a professional ensures that the job is done right the first time, preventing future complications.
- Warranty protection: If your boiler is under warranty, attempting DIY repairs may void the warranty. Hiring a professional ensures that any necessary repairs are carried out in compliance with the manufacturer’s guidelines.
By hiring a gas-safe engineer for your gas-related issues, you can ensure the safety of your home and loved ones while receiving expert assistance. Don’t hesitate to call a professional when you encounter any signs of trouble with your boiler or other gas appliances. Remember, it’s better to be safe than sorry.
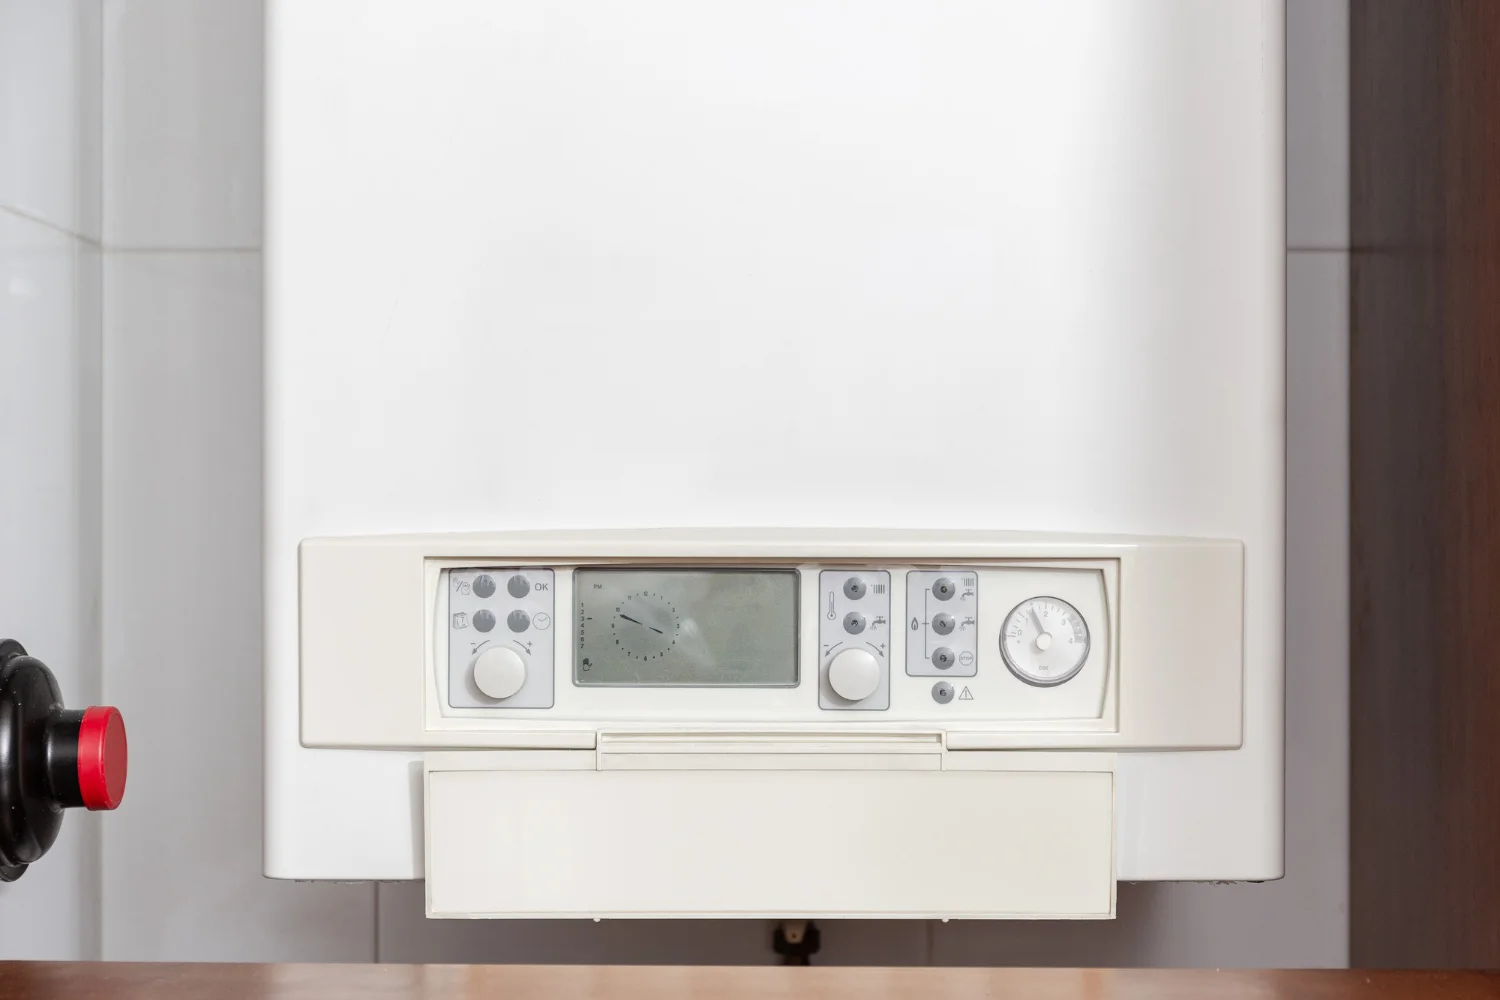
Optimising Boiler Pressure for Efficient Operation
Proper boiler pressure levels play a crucial role in ensuring the efficient operation of your heating system. Maintaining the correct pressure not only maximises energy efficiency but also prevents potential damage to the boiler.
Understand the Significance of Maintaining Proper Boiler Pressure Levels
Before diving into the steps of optimising boiler pressure, it’s important to understand why maintaining proper levels is essential. Low boiler pressure can lead to a range of problems, including reduced heat output and even complete failure of your heating system. On the other hand, excessive pressure can put unnecessary strain on various components, leading to leaks or even explosions.
Learn How to Check and Adjust Boiler Pressure Effectively
Checking and adjusting boiler pressure is a simple task that can be done by following these steps:
- Locate the pressure gauge: The pressure gauge is usually located on the front panel of your boiler. It displays the current pressure reading.
- Check the current pressure: Take note of the reading on the gauge. A typical range for residential boilers is between 1 and 1.5 bar (14-22 psi).
- Adjusting low boiler pressure: If the gauge indicates low pressure, you need to increase it for optimal performance. To do this, locate the filling loop valves near your boiler and slowly open them until you reach the desired level.
- Adjusting high boiler pressure: In case your gauge shows high-pressure readings, you’ll need to reduce it accordingly. Look for a manual release valve or bleed valve near your radiators or expansion vessel and carefully release some water until reaching the recommended range.
Save Energy Costs by Optimising Your Boiler’s Pressure Settings
Optimising your boiler’s pressure settings not only ensures efficient operation but also helps save on energy costs in the long run. By maintaining an appropriate pressure level, you can avoid unnecessary strain on the system and prevent energy wastage. Optimal pressure allows for better heat distribution throughout your home, ensuring maximum comfort.
Resolving Lack of Heating or Hot Water Problems
If you’re experiencing a lack of heating or hot water from your boiler system, there are several potential causes to consider. By following these step-by-step troubleshooting methods, you can restore the comfort and functionality of your heating system.
Determining Potential Causes
The first step in resolving the lack of heating or hot water issue is to identify the underlying problem. Start by checking the thermostat settings to ensure they are properly adjusted. Sometimes, a simple adjustment can solve the problem and restore heat or hot water.
Next, examine the power supply to your boiler. Make sure it is receiving electricity and that there are no tripped circuit breakers or blown fuses causing the lack of power. If everything appears to be in order with the thermostat and power supply, it’s time to delve deeper into potential issues with your boiler.
One common culprit behind a lack of heating or hot water is limescale buildup within the appliance. Over time, limescale can accumulate on internal components, hindering their ability to function efficiently. To address this issue, consider descaling your boiler using appropriate cleaning products recommended by professionals.
Another possible problem could be a fault in the central heating system itself. Check for any leaks or blockages in pipes that may be preventing proper circulation of hot water throughout your home. If you have radiators, ensure they are bled regularly to release trapped air that may hinder their performance.
Step-by-Step Troubleshooting Methods
Once you have identified potential causes for the lack of heating or hot water problems, follow these step-by-step troubleshooting methods:
- Verify thermostat settings: Ensure that your thermostat is set at an appropriate temperature for heating or hot water.
- Check power supply: Confirm that your boiler has access to electricity and check for any electrical issues such as tripped circuit breakers.
- Descaling: If limescale buildup is suspected, descale your boiler following the manufacturer’s instructions or consult a heating engineer for assistance.
- Inspect central heating system: Look for leaks or blockages in pipes and radiators, addressing any issues promptly to restore proper circulation.
Contacting a Professional
If you have followed the troubleshooting methods and still cannot resolve the lack of heating or hot water problems, it may be necessary to contact a professional heating engineer. They possess the expertise to diagnose and repair complex boiler issues that require specialised knowledge or tools. Seeking professional help ensures that your boiler is restored to optimal functioning without further complications.
Resolving the lack of heating or hot water problems can be achieved by methodically identifying potential causes and following step-by-step troubleshooting procedures.
Troubleshooting Boiler Pump Issues
Common Problems Associated with Boiler Pumps
Boiler issues can be frustrating, especially when they disrupt your daily routine. One common problem that homeowners often encounter is pump malfunctions. Understanding the common problems associated with boiler pumps is crucial in resolving these issues effectively.
A faulty pump can lead to a variety of problems, such as inadequate heating, strange noises, or even a complete system shutdown. Identifying these issues early on can save you time and money in the long run. Here are some common problems you may encounter:
- Lack of circulation: If you notice that certain areas of your home are not receiving adequate heat, it could be due to poor circulation caused by a faulty pump. This issue often results from airlocks or blockages within the system.
- Excessive noise: Unusual noises coming from your boiler could indicate a problem with the pump. A loud humming sound or constant rattling might suggest worn-out bearings or loose components within the pump.
- Leaking water: Any signs of water leakage around the boiler should never be ignored, as this could indicate a damaged seal or gasket in the pump assembly.
Troubleshooting Pump Issues Effectively
When faced with boiler pump problems, it’s essential to troubleshoot them effectively to restore proper functionality and avoid further complications. Here’s a step-by-step guide to help you resolve these issues:
- Check power supply: Ensure that the pump is receiving power by examining circuit breakers and switches connected to it.
- Inspect for blockages: Examine all valves and pipes leading to and from the pump for any obstructions or airlocks that may hinder proper circulation.
- Bleed radiators: If certain areas of your home are not receiving sufficient heat, bleeding radiators can release trapped air and improve circulation throughout the system.
- Check pressure levels: Inspect the pressure gauge on your boiler to ensure it falls within the recommended range. Low pressure can cause pump-related problems.
- Clean or replace filters: Clogged filters can restrict water flow and put unnecessary strain on the pump. Regularly clean or replace them to maintain optimal performance.
Key Takeaways for Boiler Troubleshooting
Congratulations! You’ve now learned some essential steps in troubleshooting common boiler problems. By following the sections completed above, you can tackle issues such as cold radiators, frozen condensate pipes, pilot light problems, boiler water leaks, heating or hot water problems, and boiler pump issues. Remember to prioritise safety and consult a Gas Safe Engineer for any gas-related concerns.
Now that you’re equipped with this knowledge, it’s time to put it into action. Don’t let boiler problems leave you in the cold. Take charge of your heating system and ensure optimal performance year-round. With these troubleshooting techniques under your belt, you’ll be able to save money on costly repairs and keep your home warm and comfortable.
Frequently Asked Questions (FAQs)
Related articles


At a glance
Imagine this: it’s a chilly winter morning, and you wake up to find your home feeling more like an icebox than a cosy haven. The cold water in your appliance and frozen condensate pipe can make it difficult to heat water. The cold water in your appliance and frozen condensate pipe can make it difficult to heat water. You rush to the basement, only to discover that your boiler is making strange noises and refusing to heat water, providing the warmth you desperately need. It seems like there might be a problem with the frozen condensate pipe. In this situation, it’s important to make an emergency call for help before you’re left with cold water. Frustration sets in as you realise that you’ll have to endure freezing temperatures until the emergency call for a frozen condensate pipe job arrives.
In this comprehensive guide, we will explore several reasons behind common boiler problems at work, provide step-by-step instructions for troubleshooting them effectively, and emphasise the importance of consulting your system’s manual along the way. Additionally, we will include some insightful quotes from industry experts to further enhance your understanding.
Identifying and Fixing Cold Radiators
Is there anything more frustrating than a cold radiator on a chilly day? When your home heating system isn’t working properly, it can quickly turn your cosy haven into an uncomfortable space.
Causes of Cold Radiators
There are several reasons why your radiators may be failing to heat up adequately. One common culprit is trapped air in the system. Over time, air can accumulate within the pipes and prevent hot water from circulating effectively. Another possible cause is a buildup of sludge or debris within the radiator itself, obstructing the flow of heated water. If your boiler pressure is too low, it may not be able to distribute hot water efficiently throughout the system.
Bleeding Air from Radiators
Bleeding air from radiators is a simple yet effective method to improve heat distribution in your home heating system. Here’s how you can do it:
- Start by turning off your central heating system.
- Locate the bleed valve on each radiator in your home.
- Place a towel or container beneath the valve to catch any water that may escape.
- Using a radiator key or screwdriver (depending on the type of bleed valve), slowly turn the valve counterclockwise until you hear a hissing sound.
- Keep turning until water starts dripping out steadily.
- Once water begins to flow consistently without any air bubbles, close the valve tightly.
By bleeding air from your radiators regularly, you can ensure that they work efficiently and provide optimal warmth throughout your home.
Other Potential Reasons for Cold Radiators
If bleeding air doesn’t solve the problem entirely, there might be other underlying issues causing cold radiators in your home heating system. Consider these potential reasons and their corresponding fixes:
- Low boiler pressure: Check the pressure gauge on your boiler and ensure it is within the recommended range. If it’s too low, you may need to repressurize the system.
- Blocked pipes: Inspect the pipes connected to your radiators for any obstructions or blockages. Clearing them out can restore proper water flow.
- Faulty thermostatic radiator valves (TRVs): If certain radiators remain cold while others heat up, faulty TRVs could be to blame. Consider replacing them with new ones.
Remember, if you’re unsure about performing any of these troubleshooting steps yourself, it’s always best to consult a professional heating engineer.
Dealing with Frozen Condensate Pipe Issues
Frozen condensate pipes can be a major headache, leading to boiler breakdowns and leaving you without heat and hot water. Understanding why these pipes freeze and learning effective methods to thaw them is crucial for troubleshooting common boiler problems. Discovering preventive measures can help you avoid future freezing of condensate pipes.
Condensate pipes freeze when the water inside them solidifies due to low temperatures. This blockage prevents the proper drainage of condensation from your boiler, resulting in a shutdown. To address this issue, here are some steps you can take:
Thawing a Frozen Condensate Pipe Safely
- Locate the frozen section: Start by identifying where the pipe is frozen. Look for any visible signs such as frost or ice buildup.
- Apply warm water: Gently pour warm (not boiling) water over the frozen area of the condensate pipe. This will gradually melt the ice and allow it to flow away.
- Use a hot water bottle or heating pad: Wrap a hot water bottle or heating pad around the frozen section of the pipe. The heat will aid in thawing it more quickly.
- Insulate exposed sections: Once you have successfully thawed the condensate pipe, consider insulating any exposed sections to prevent future freezing.
Preventive Measures for Avoiding Freezing
- Install insulation: Insulate both internal and external condensate pipes using foam insulation sleeves or wrap them with self-adhesive insulation tape.
- Relocate exterior pipes: If possible, relocate external condensate pipes to an area less prone to freezing, such as an indoor space or an insulated duct.
- Keep airflow clear: Ensure that there are no obstructions near exterior outlets or vents that could impede air circulation around the condensate pipe.
- Maintain adequate heating: Keep your home heated to a sufficient temperature, especially during colder months. This helps prevent condensate pipes from freezing.
By following these steps and implementing preventive measures, you can effectively deal with frozen condensate pipe issues. Remember, if you are unsure or uncomfortable performing any of these tasks yourself, it is always best to seek professional assistance.
Troubleshooting Pilot Light Problems
Identifying Common Pilot Light Issues
Pilot light problems are a common cause of boiler malfunctioning. Understanding the common issues that can arise with the pilot light is crucial for troubleshooting and resolving these problems effectively.
One common issue is a weak or flickering pilot light. This could be due to a dirty or clogged pilot tube, which restricts the flow of gas. Another possible cause is a faulty thermocouple, a safety device that detects whether the pilot light is lit. If the thermocouple is defective, it may not allow gas to reach the pilot light, causing it to go out.
Relighting a Pilot Light Correctly: Step-by-Step Instructions
Relighting a pilot light may seem daunting at first, but with step-by-step instructions, you can do it yourself safely and efficiently.
- Start by locating the gas valve control knob on your boiler. It should have three positions: “Off,” “On,” and “Pilot.”
- Turn the knob to “Off” and wait for at least five minutes to allow any residual gas to dissipate.
- After waiting, turn the knob to “Pilot.” While pressing down on the knob, use a long lighter or matchstick to ignite the pilot burner located near the bottom of your boiler.
- Keep holding down the control knob for about one minute after lighting the pilot light. This allows heat from the flame to warm up and activate the thermocouple properly.
- Release the control knob gently after one minute while ensuring that the flame remains lit.
- Finally, turn the gas valve control knob from “Pilot” to “On.” Your boiler should now start functioning correctly again.
Knowing When to Seek Professional Help
While relighting a pilot light can often solve minor issues, there are situations where it’s best to call in a professional for assistance:
- If you smell gas before or after attempting to relight the pilot light, evacuate your home immediately and contact a professional plumber or gas company.
- If the pilot light keeps going out despite repeated attempts to relight it, there may be an underlying problem that requires professional diagnosis and repair.
- When dealing with complex boiler systems or if you are unsure about any aspect of troubleshooting the pilot light, it’s always wise to consult a qualified technician who can provide expert guidance.
Remember, safety should be your top priority when dealing with gas appliances. If in doubt or if you encounter any potentially dangerous situations, don’t hesitate to seek professional help.
Fixing Boiler Water Leaks
Water leaks in your boiler system can be a frustrating and potentially costly problem. It is important to recognize the signs of water leaks, understand their causes, and know how to address them. Regular maintenance also plays a crucial role in preventing water leaks. In this guide, we will take you through step-by-step instructions on fixing boiler water leaks.
Recognize signs of water leaks in your boiler system
Detecting water leaks early on can save you from further damage and expenses. Here are some common signs that indicate a potential boiler leak:
- Dripping or pooling water: If you notice any water dripping from the boiler or pooling around it, it is a clear sign of a leak.
- Loss of pressure: A sudden drop in boiler pressure could be an indication of a leak somewhere within the system.
- Visible corrosion: Check for any rust or corrosion on the pipes connected to your boiler as it may indicate a leak.
Discover possible causes of water leaks and how to address them
Understanding the underlying causes of water leaks is essential for effective troubleshooting. Here are some potential reasons for boiler water leaks along with corresponding solutions:
- Damaged seals or gaskets: Over time, seals and gaskets can deteriorate, leading to leakage. To fix this issue, replace the faulty seals or gaskets.
- Cracked heat exchanger: A cracked heat exchanger can cause water leakage within the boiler system. In such cases, professional repair or replacement is necessary.
- Faulty filling loop: The filling loop allows you to add pressure to your boiler when needed. If the filling loop is damaged or not properly connected, it can result in leaks. Inspect the filling loop and replace it if necessary.
Learn about the importance of regular maintenance in preventing water leaks
Regular maintenance plays a vital role in preventing boiler water leaks. By following these maintenance practices, you can minimise the risk of leaks:
- Annual servicing: Schedule annual boiler servicing by a qualified technician to ensure that all components are in good working condition.
- Monitor pressure levels: Regularly check the pressure gauge on your boiler and maintain it within the recommended range.
- Inspect pipes for corrosion: Check the pipes connected to your boiler for any signs of corrosion or damage. Replace any corroded pipes promptly.
By staying vigilant and addressing potential issues promptly, you can prevent water leaks and prolong the lifespan of your boiler system.
Hiring a Gas gas-safe engineer for Gas-related Issues
It is crucial to hire a qualified and experienced gas-safe engineer. Attempting to fix these issues alone can be dangerous and may lead to further complications. Here’s why you should always rely on professionals for such jobs.
Understand the Importance of Hiring a Qualified Gas gas-safe engineer
Gas-related problems require specialised knowledge and expertise to ensure safety and efficiency. A gas-safe engineer possesses the necessary qualifications and certifications to handle these issues effectively. By hiring an accredited professional, you can have peace of mind knowing that they have undergone rigorous training and are equipped with the skills needed to address any gas-related problem.
Look for the Right Qualifications and Certifications
When searching for a gas-safe engineer, make sure they are registered with the appropriate authorities. Look for engineers who are Gas Safe registered, as this certification guarantees their competence in handling gas appliances safely. Check if they have relevant industry certifications or memberships that showcase their commitment to maintaining high standards.
Benefits of Hiring Professionals Instead of Attempting DIY Repairs
While it may be tempting to save money by attempting DIY repairs on your boiler or other gas appliances, it is not worth compromising your safety.
Here are some benefits of hiring professionals:
- Expertise: Gas-safe engineers possess extensive knowledge about different types of boilers and heating systems. They can quickly diagnose problems and provide effective solutions.
- Safety: Dealing with gas can be hazardous if not handled properly. Professionals understand the risks involved and follow strict safety protocols during repairs.
- Time-saving: With their experience, professionals can efficiently troubleshoot common boiler problems, saving you time and effort.
- Long-term cost savings: Incorrect repairs or installations can lead to more significant issues down the line, resulting in costly repairs or even replacements. Hiring a professional ensures that the job is done right the first time, preventing future complications.
- Warranty protection: If your boiler is under warranty, attempting DIY repairs may void the warranty. Hiring a professional ensures that any necessary repairs are carried out in compliance with the manufacturer’s guidelines.
By hiring a gas-safe engineer for your gas-related issues, you can ensure the safety of your home and loved ones while receiving expert assistance. Don’t hesitate to call a professional when you encounter any signs of trouble with your boiler or other gas appliances. Remember, it’s better to be safe than sorry.
Optimising Boiler Pressure for Efficient Operation
Proper boiler pressure levels play a crucial role in ensuring the efficient operation of your heating system. Maintaining the correct pressure not only maximises energy efficiency but also prevents potential damage to the boiler.
Understand the Significance of Maintaining Proper Boiler Pressure Levels
Before diving into the steps of optimising boiler pressure, it’s important to understand why maintaining proper levels is essential. Low boiler pressure can lead to a range of problems, including reduced heat output and even complete failure of your heating system. On the other hand, excessive pressure can put unnecessary strain on various components, leading to leaks or even explosions.
Learn How to Check and Adjust Boiler Pressure Effectively
Checking and adjusting boiler pressure is a simple task that can be done by following these steps:
- Locate the pressure gauge: The pressure gauge is usually located on the front panel of your boiler. It displays the current pressure reading.
- Check the current pressure: Take note of the reading on the gauge. A typical range for residential boilers is between 1 and 1.5 bar (14-22 psi).
- Adjusting low boiler pressure: If the gauge indicates low pressure, you need to increase it for optimal performance. To do this, locate the filling loop valves near your boiler and slowly open them until you reach the desired level.
- Adjusting high boiler pressure: In case your gauge shows high-pressure readings, you’ll need to reduce it accordingly. Look for a manual release valve or bleed valve near your radiators or expansion vessel and carefully release some water until reaching the recommended range.
Save Energy Costs by Optimising Your Boiler’s Pressure Settings
Optimising your boiler’s pressure settings not only ensures efficient operation but also helps save on energy costs in the long run. By maintaining an appropriate pressure level, you can avoid unnecessary strain on the system and prevent energy wastage. Optimal pressure allows for better heat distribution throughout your home, ensuring maximum comfort.
Resolving Lack of Heating or Hot Water Problems
If you’re experiencing a lack of heating or hot water from your boiler system, there are several potential causes to consider. By following these step-by-step troubleshooting methods, you can restore the comfort and functionality of your heating system.
Determining Potential Causes
The first step in resolving the lack of heating or hot water issue is to identify the underlying problem. Start by checking the thermostat settings to ensure they are properly adjusted. Sometimes, a simple adjustment can solve the problem and restore heat or hot water.
Next, examine the power supply to your boiler. Make sure it is receiving electricity and that there are no tripped circuit breakers or blown fuses causing the lack of power. If everything appears to be in order with the thermostat and power supply, it’s time to delve deeper into potential issues with your boiler.
One common culprit behind a lack of heating or hot water is limescale buildup within the appliance. Over time, limescale can accumulate on internal components, hindering their ability to function efficiently. To address this issue, consider descaling your boiler using appropriate cleaning products recommended by professionals.
Another possible problem could be a fault in the central heating system itself. Check for any leaks or blockages in pipes that may be preventing proper circulation of hot water throughout your home. If you have radiators, ensure they are bled regularly to release trapped air that may hinder their performance.
Step-by-Step Troubleshooting Methods
Once you have identified potential causes for the lack of heating or hot water problems, follow these step-by-step troubleshooting methods:
- Verify thermostat settings: Ensure that your thermostat is set at an appropriate temperature for heating or hot water.
- Check power supply: Confirm that your boiler has access to electricity and check for any electrical issues such as tripped circuit breakers.
- Descaling: If limescale buildup is suspected, descale your boiler following the manufacturer’s instructions or consult a heating engineer for assistance.
- Inspect central heating system: Look for leaks or blockages in pipes and radiators, addressing any issues promptly to restore proper circulation.
Contacting a Professional
If you have followed the troubleshooting methods and still cannot resolve the lack of heating or hot water problems, it may be necessary to contact a professional heating engineer. They possess the expertise to diagnose and repair complex boiler issues that require specialised knowledge or tools. Seeking professional help ensures that your boiler is restored to optimal functioning without further complications.
Resolving the lack of heating or hot water problems can be achieved by methodically identifying potential causes and following step-by-step troubleshooting procedures.
Troubleshooting Boiler Pump Issues
Common Problems Associated with Boiler Pumps
Boiler issues can be frustrating, especially when they disrupt your daily routine. One common problem that homeowners often encounter is pump malfunctions. Understanding the common problems associated with boiler pumps is crucial in resolving these issues effectively.
A faulty pump can lead to a variety of problems, such as inadequate heating, strange noises, or even a complete system shutdown. Identifying these issues early on can save you time and money in the long run. Here are some common problems you may encounter:
- Lack of circulation: If you notice that certain areas of your home are not receiving adequate heat, it could be due to poor circulation caused by a faulty pump. This issue often results from airlocks or blockages within the system.
- Excessive noise: Unusual noises coming from your boiler could indicate a problem with the pump. A loud humming sound or constant rattling might suggest worn-out bearings or loose components within the pump.
- Leaking water: Any signs of water leakage around the boiler should never be ignored, as this could indicate a damaged seal or gasket in the pump assembly.
Troubleshooting Pump Issues Effectively
When faced with boiler pump problems, it’s essential to troubleshoot them effectively to restore proper functionality and avoid further complications. Here’s a step-by-step guide to help you resolve these issues:
- Check power supply: Ensure that the pump is receiving power by examining circuit breakers and switches connected to it.
- Inspect for blockages: Examine all valves and pipes leading to and from the pump for any obstructions or airlocks that may hinder proper circulation.
- Bleed radiators: If certain areas of your home are not receiving sufficient heat, bleeding radiators can release trapped air and improve circulation throughout the system.
- Check pressure levels: Inspect the pressure gauge on your boiler to ensure it falls within the recommended range. Low pressure can cause pump-related problems.
- Clean or replace filters: Clogged filters can restrict water flow and put unnecessary strain on the pump. Regularly clean or replace them to maintain optimal performance.
Key Takeaways for Boiler Troubleshooting
Congratulations! You’ve now learned some essential steps in troubleshooting common boiler problems. By following the sections completed above, you can tackle issues such as cold radiators, frozen condensate pipes, pilot light problems, boiler water leaks, heating or hot water problems, and boiler pump issues. Remember to prioritise safety and consult a Gas Safe Engineer for any gas-related concerns.
Now that you’re equipped with this knowledge, it’s time to put it into action. Don’t let boiler problems leave you in the cold. Take charge of your heating system and ensure optimal performance year-round. With these troubleshooting techniques under your belt, you’ll be able to save money on costly repairs and keep your home warm and comfortable.


